 In 1955 the United States issued its requirements for an all-weather carrier-based ground-attack aircraft to replace the old Skyraider. In 1958 Grumman was awarded a contract for the development of the A2F-1.
In 1955 the United States issued its requirements for an all-weather carrier-based ground-attack aircraft to replace the old Skyraider. In 1958 Grumman was awarded a contract for the development of the A2F-1.
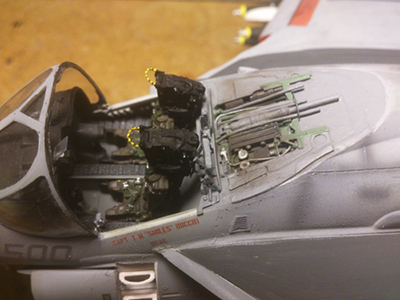
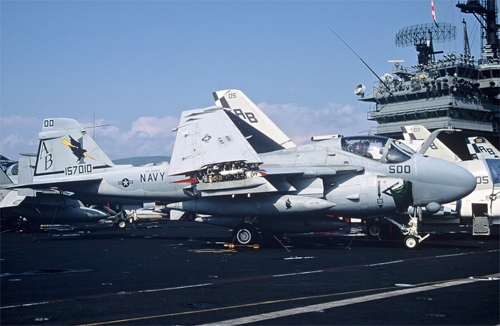
The initial design had jet nozzles that could swivel downward for shorter takeoffs and landings, but this feature never made it into the prototype. The cockpit uses an unusual double pane windscreen and side-by side seating arrangement in which the pilot sits in the left seat, while the bombardier/navigator sits to the right and slightly below. The incorporation of an additional crew member with separate responsibilities, along with a unique cathode ray tube (CRT) display that provided a synthetic display of terrain ahead, enabled low-level attack in all weather conditions.
The Revell kit contains a model of the A-6E. The E was a vast improvement over the previous Intruders. A new Norden AN/APQ-148 multi-mode radar and onboard computers replaced the earlier separate search and track radars and transistor-based technology. And from 1979 on, all A-6Es were fitted with the AN/AAS-33DRS (Detecting and Ranging Set), part of the "Target Recognition and Attack Multi-Sensor" (TRAM) system, a small, gyroscopically stabilized turret, mounted under the nose of the aircraft, containing a FLIR bore sighted with a laserspot-tracker/designator and IBM System/4 Pi computer. The kit gives you the choice to make a regular E or a TRAM.
The box is big and the model was first issued in 1988. The age of the model is evident. Raised panel lines, some cruel details, flash and decals in a pretty bad shape. But this is the only Intruder available in this scale (until late 2011 Kinetics launched their Intruder). And actually it isn't that bad at all. Besides that, there is a huge amount of add ons available on the aftermarket.
A kit from the '80s is nothing like a modern multimedia kit. Raised panel lines, hardly any options, poor fitting and lots of flash and mold seams. To bring this kit up to today’s standard there was a lot of work to do.
The following changes are scratch build:
- All the panel lines were rescribed
- The TRAM is correct fitted into the nose section
- The boarding ladders are rebuilt to match with the seamless intakes
- The nav light on the wingtips are made from transparent sprue
- The bay of the birdcage is build from scratch
- The spoilers and ailerons are scratch build
- The tail nav light is made from transparent sprue
The following add ons are used:
- Paragon 48094 Flaps, Slats and Airbrakes, of which the airbrakes were not used
- Eduard 48172 Detail set, of which most of the parts were used
- Verlinden 828 Update, this one provided the cockpit
- Super Bug Models SBMR48030 A-6 / EA-6 Seamless Intakes w/Compressors;
- AfterBurner Decals 48-080 A-6E Desert Storm Intruders, this decal set provided the VA-65 500 markings
- Quickboost 48318 A-6A/E, EA-6A refueling probe, because I lost the original one during a "crash"
- Hasegawa Aircraft Weapons: A U.S. Bombs & Tow target system, provided the Mk 82 bombs
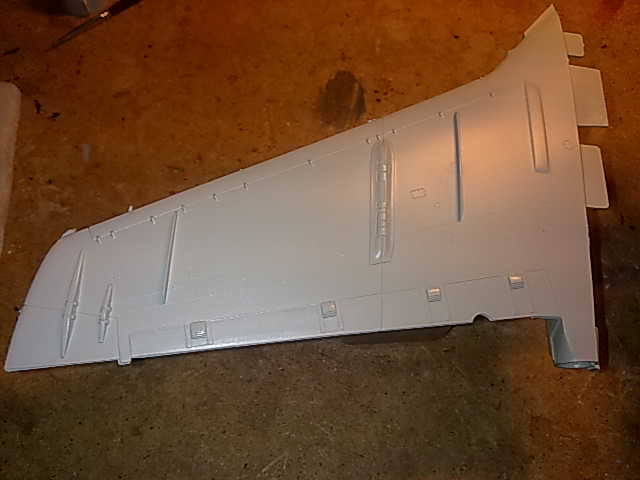
The kit's panel lines are raised enough to use them as a guide for new recessed panel lines. I just started when all the main parts were not attached yet. It is much easier scribing when the flat back of the fuselage halves or the wings are flat on your workbench.
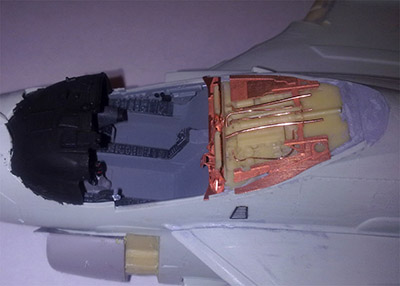
The directions start with the cockpit. At this point you already have to choose between the standard E and the TRAM version, because they both have a different cockpit. To pimp my cockpit I already had the Verlinden set and the Eduard set since they came with my kit. Working with the Verlinden resin was initially a disappointment. In my opinion the details are not that clear and fitting is poor. But in the line of the Intruder itself, reworking every part, I began to like working with the Verlinden resin. I just had to forget the high tech resin by Aires etc.
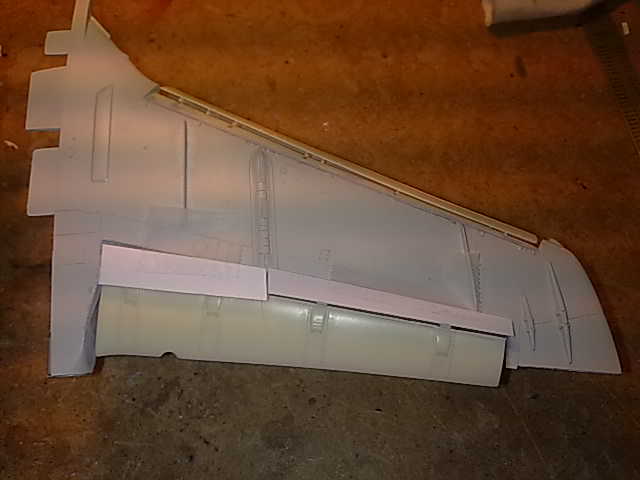
 Like many carrier aircraft the Intruder is equipped with lots of flaps, slats and airbrakes. One of the more interesting looks of the Intruder is when all those large moving panels are extended. Another special feature of the Intruder is the spoilers, or spoilerons on the topside of the wings. Since the Intruder has no ailerons the lateral movement is controlled with these spoilers.
The Revell kit has no options in dropping the flaps or extending the airbrakes on the wingtips whatsoever. But that's why we have a huge aftermarket. With my kit came a resin set of Paragon (48094) slats and flaps. It also has the feathered airbrakes, but I didn't use them.
Attaching the slats is only difficult, but fitting in the flaps is just almost impossible. I did a lot of research on these flaps and I came to the conclusion why the flaps wouldn't fit. They slide from underneath the spoilers to the back of the wing. The remaining kit's spoilers are just way too thick. Another detail I noticed on the real aircraft was that the spoilers often are lifted more or less. So I decided to scratch build these spoilers so that 1) the flaps would have all the space they needed, and 2) I could lift them to add some extra reality.
I choose to rebuild a couple of other parts on the fuselage too. From nose to tail these sections are: the TRAM, the boarding ladders and air intakes, the nozzles, electronic bay and the taillight.
Fitting the TRAM was easy, but then I realized the real thing looks different. And I didn't want it to display it stored, but with the sensors visible.
 The models exhaust nozzles are poor, actually not present. After a couple of days of trial and error I finally used two identical pens to simulate the nozzles. They were sanded to a thin pipe and milliput was used to create the sealing.
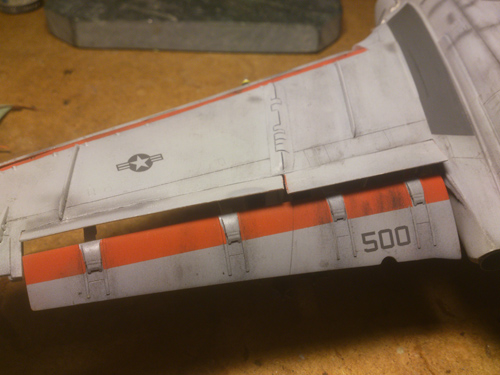
The extensible equipment platform, or Birdcage, just behind the engines is well presented by the Eduard PE parts. This platform contains a chaff dispenser, electronics and the Doppler navigation radar antenna. The bay itself at the other hand had to be scratch build.