.: Kinetic F-16AM Block 15 Nato Viper
 There are many models available of the F-16. It is probably one of the most famous aircraft for a model. I can remember building at least two F-16's before. A 1/48 model, I can not recall the brand, and the vintage 1/32 Hasegawa F-16A.The model dates from at least 1977.
Today Hasegawa as a nice collection of F-16's, and Tamiya's 1/48 and 1/32 models are state of the art. Kinetic is a new kid in town, delivering kits that everybody wanted, but never were available, like the Hawkeye and the Prowler in the 1/48 scale range. Another relatively new kit range by Kinetic is the F-16. At the moment Kinetic has 11 different Viper models available.
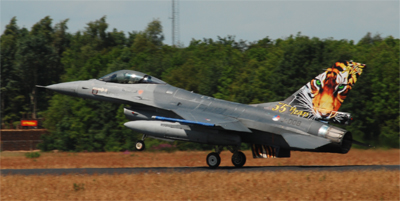
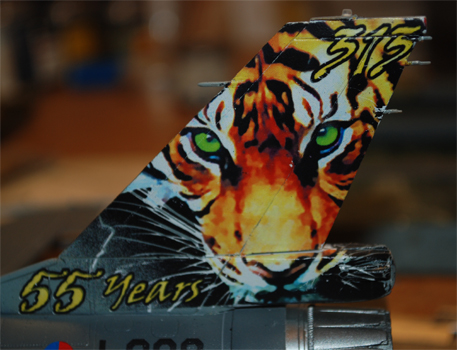
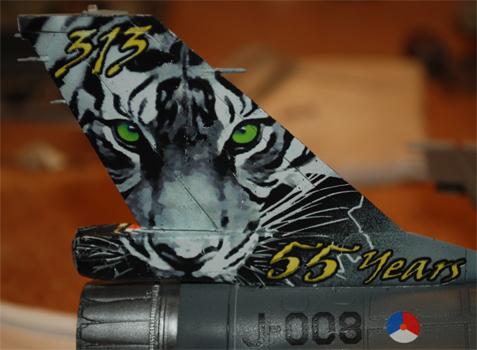
One of the models is the F-16A MLU, block 15, also known as the F-16AM. This particular aircraft is widely used by the NATO, including the Netherlands Air Force. As a Dutchman I always wanted to build a dutch viper. During the Open Days of the Netherlands Airforce at Volkel in 2009 I saw an ex-Tiger Meet F-16 participating in a air-power demonstration. The Tiger Meet tail was one of the best I had ever seen.
Besides a suitable F-16 model I also needed the proper decals. Syhart could deliver them (J-008 « 55 Jaar 313sqn Tiger » KLU 2008).
The J-008 came in service with the Royal Netherlands Airforce in 1991 as a F-16A Block 15AG OCU and is currently upgraded to Block 20 MLU. In the year 2008 the special 55 year anniversary Tiger Meet painting was applied. This painting has lately been removed.
The Box of the Kinetic kit is very well filled with sprues. A large part of the spues contains a good arsenal of weapons. Enough to fill your spare part box anyway. 3 Fuel tanks, 2 different types of LANTIRNs, Litening, Sniper XR, ALQ-131, 4 of each Sidewinder type M and X, 4 of each type AMRAAM B and C, Mavericks, Pinguins, Mk.82's, Paveway II and III, JDAM's and CBU-87's. That is more then a regular Hasegawa Weapons set!
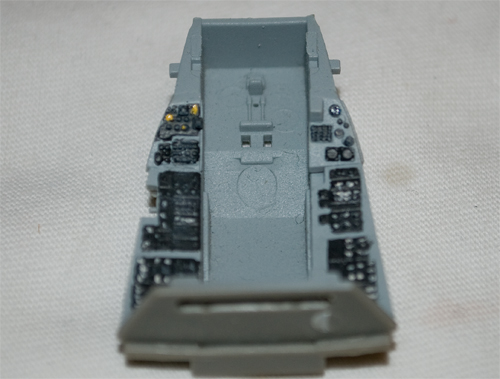
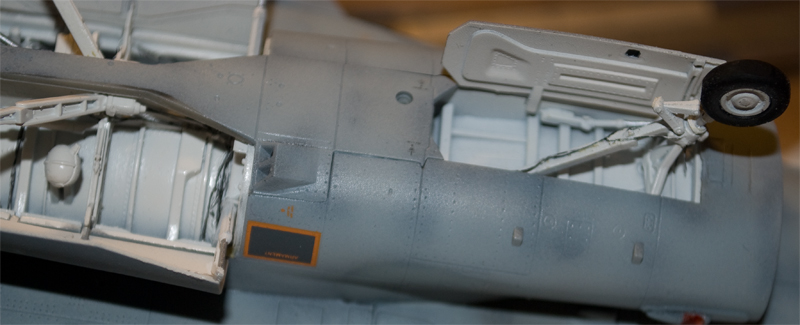
The kit detailing is also very complete, some well formed wheel bays, a acceptable cockpit and a very nice detailed exhaust. As already said, the cockpit is acceptable, but in my line of detailed cockpits I ordered the Aires resin cockpit for the Hasegawa kit, a resin cockpit for the Kinetic kit wasn't available yet.
Kinetic is a new player in modeling land, a good one for sure, but there is one draw back. The moldings are definitely not flash free and the molding technology that they are using leaves mold tabs where the ejector pins push the sprues out of the molds. Big, thick and nasty pins which most of the time need to be removed before putting the part together.
I started eventually with the kit's own cockpit, but very soon I dropped this one and ordered the Aires add-on. Because this resin cockpit was meant to fit in the Hasegawa kit it needed a lot of trimming to squeeze it in the smaller(?) body of the Kinetic kit. The Kinetic body seems to be of a different shape then the Hasegawa body. I guess the Hasegawa one is more correct, but since I am not tend to put them together on one shelve, I think it will not really be noticed.
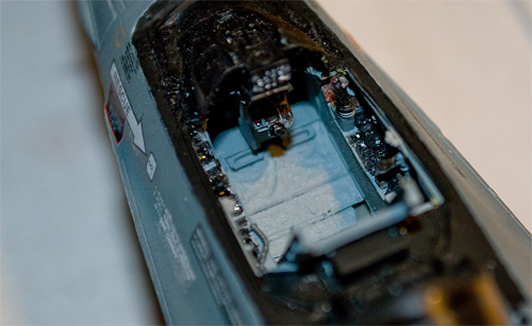
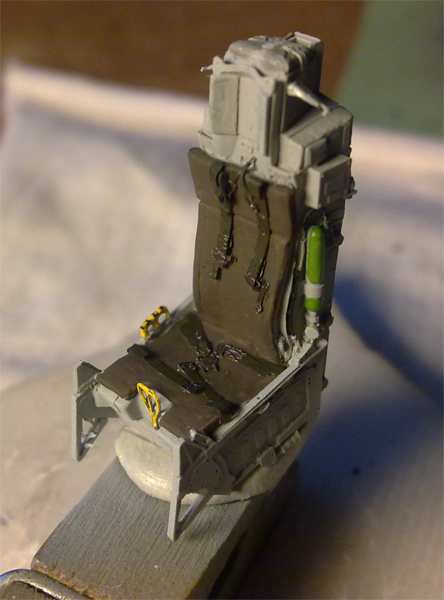 The kit has a pretty good seat, but the Aires cockpit-set comes with an even better one. The resin seat looks amazingly good detailed, and with a little help of reference photo's I managed to make it a real ACES II seat. The photo-etched parts the belong to the Aires set are a little hard to handle, but glued to the seat the look right.