.: Tamiya Swordfish Mk.I
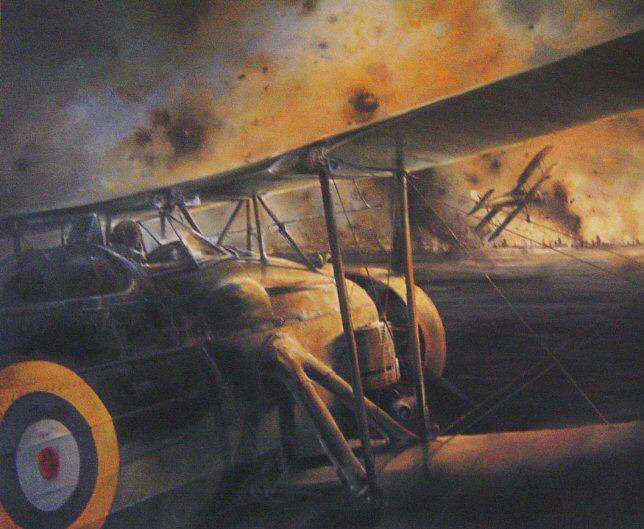 The Fairey Swordfish was a torpedo bomber built by the Fairey Aviation Company and used by the Fleet Air Arm of the Royal Navy. Affectionately known as the "Stringbag" by its crews, it was outdated by 1939, but achieved some spectacular successes during the war, notably the sinking of one and damaging two battleships of the Regia Marina in the Battle of Taranto on 11–12 November 1940. And later on 25 May 1941 the famous crippling of the Bismarck. It was operated primarily as a fleet attack aircraft; however, during its later years, it was also used as an anti-submarine and training aircraft. Designed in the 1930s, the Swordfish outlived several types intended to replace it, and remained in front line service through the end of the war in Europe.
.: The Kit
The Tamiya Swordfish is one of the new generation models made by Tamiya. The kit itself is of high Tamiya standards, of course. But Tamiya as taken another step forward by also making an extra set of photo-etched parts available. There has been a lot of talk about this Tamiya add-on. Why would a company sell a detailset separately, and not include it with the actual model. Well, my guess is it would simply make the model way to expensive. The base model itself costs already a little fortune, and with the add-on already included it would certainly be too expensive for lots of modellers. Now Tamiya lets the choice with the modeller. And the modeller has always the choice to choose add-ons from another manufacturer.
I chose for the Tamiya add-on, number 61069. It includes all the rigging and some extra parts for the weapon sights and engine. But for further detailing the already beautiful cockpit I also purchased the Edward colour detail set, number 49212. This meant I would have some double parts for the engine and cockpit, but the choice in this is easy to make. Although the Tamiya PE parts are good, Eduard is still the leading PE-parts maker.
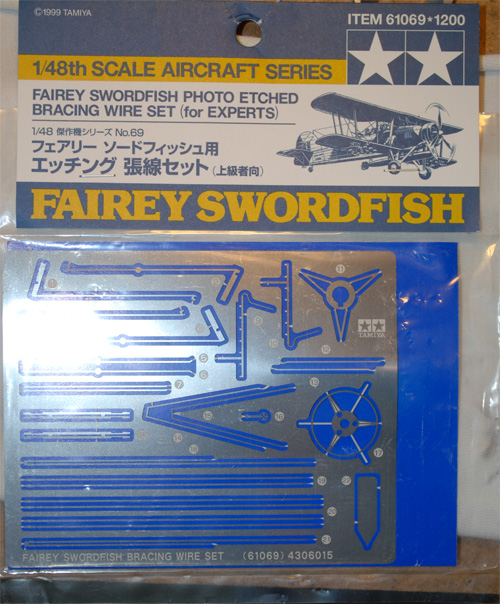

The Tamiya addon and the Eduard addon, partly used.
As already said, the cockpit is a real masterpiece. Building this little gem took me quite a long time.
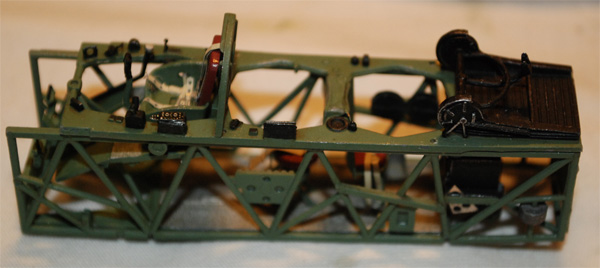
The Tamiya cockpit with Eduard PE-parts.
Placing the cockpit inside the hull is a scary thing to do. Does it fit? Am I going to break something? With a bit of superglue and lots of patience I managed to place the cockpit in the right side of the fuselage.

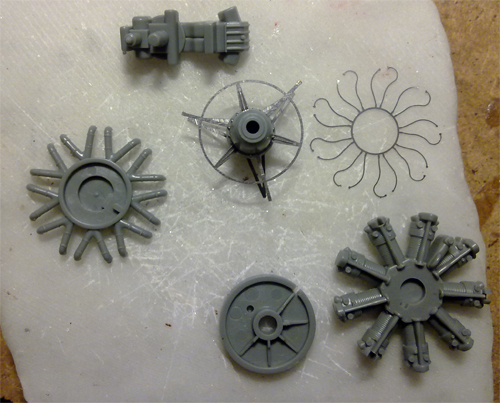 In the meantime I started with the engine. The Tamiya add-on has some parts for the engine, but compared to the Eduard parts the Tamiya parts are much thicker. Besides that, Eduard has some more parts for the engine.
The Engine, once build and painted, really look great. Luckely it isn't going to disappear totally under the cowl.
The fitting of the two fuselage sides is good, although I had some trouble to squeeze the cockpit in. Do not forget to make the preparations in case you are going to use photo-etched parts for the rigging. Also take care of a good fix on the side-windows, one of mine came loose while handling the fuselage. And it it pretty hard to refix it.
The wings do fit good too. Instead of the usual two wings we normally have to make, this plane is fitted with four wings (duh!). I decided to do most of the paintwork before assembling the main parts and the frames. That makes applying the softline scheme lots easier.
.: Painting
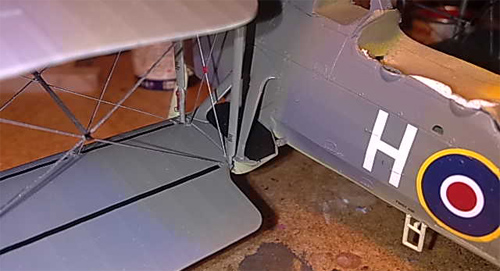
The Tamiya kit provides three different schemes and appropriate decals. I chose the one that depicts the Swordfish used in the Tarano attack, and not the more obvious Bismark one. The kit comes with a 1:48, or must I say 1:1, scale drawing of the camouflage scheme. The color I used were Model Master 2059 Dark Sea Grey, 2056 Dark Slate Grey and 2049 RAF Sky.
Soft lines were applied with the use of blue-tack.
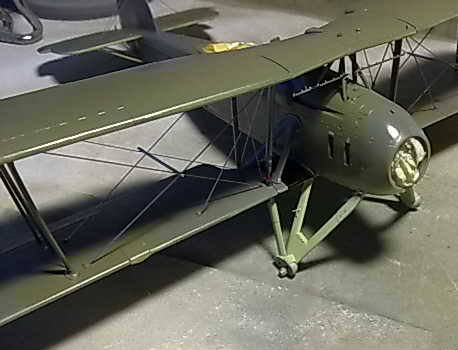 After painting the cammo pattern I attached the rigging. It was a hard job to get them all tight. To get them straight I glued one side on place and on the other end I drilled a small hole in the wing. The wire was fixed on that side in the hole with a drop of super glue. The remaining hole I filled with white glue. The cross bar between the rigs I made of a small round rod, because the Tamiya one is in my opinion not correct.
Finally, after painting the rigging, I futured the whole model, ready for decaling and final assembly.
.: Decals
As mentioned above, three different versions come with the kit:
A. 825th squadron, Lt. Commander E. Esmonde
B. Bismark attack, Lieutenant A.W.D. Beale
C. 823th squadron
 My first choice was the Bismark attack version, but during the process the scheme on the aircraft used during the battle of Taranto I liked more. The third version is an all silver scheme, very attractive too, by the way.
The decals that come with the kit are a little on the thick side, but they come on very well. Colors are good and they react very well to Micro Sol. There are not too many decals to put in. Besides the markings and a couple of lines there are only four decals with some text to put on the wing-struts.
.: Final assembly
I planned to make the control cables on the tailsection of fishing line. Initially this looked good, but after a while the wires streched. I had to replace them with streched sprue.
Final assembly consisted of putting the engine into place, underwing armament and attaching the guns.
The last thing I attached was the starter handle. The funny thing is I wanted the place the Eduard starter handle but lost it to the carpet monster. I was in doubt whether or not make another one. I decided to make one from spue. In the end it seems the most striking part of the model!
:. Conclusion
The Tamiya Swordfish is a real must have if you like bi-planes or just want a challenge with no fitting problems. Although the kit is expensive and add-ons don’t come cheap either, it's every dime worth. On the other hand, do not expect to build the model over a weekend, the rigging, the cockpit and the engine will need some time to build.
Definitely recommended!