.: Tamiya German Flakpanzer IV Möbelwagen
 The Tamiya Flakpanzer IV Vierling actually is a hypothetical model. In 1943 ground-based anti-aircraft weaponry was becoming increasingly important to the Wehrmacht. The prototype of the Flakpanzer IV based AA-gun was displayed to Hitler on December 7, 1943, used a 20 mm quad-gun. But the "Vierling" was deemed too weak for the latest aircraft, which were constantly flying higher and faster. Only a single prototype with this gun was produced before the design was rejected. So there goes replication of history with this kit, unless you want to build the prototype of course.
Why Tamiya produced this kit isn’t hard to imagine, They had the Vierling, the anti-aircraft gun crew, and the Panzer IV. They only had to produce a new deck for the Panzer and a couple of armorshields.
Since this would be my first piece of armour in 25 years (not counting the Vierling I have made before) a bit of freedom on creating this kit would be more then welcome. The search for a scheme ended when I realized there was only one prototype made. This would be just a what-if model.
The box
The box contains a series of spues divided in Panzer IV base, a new deck and armorschields, the actual Vierling with on another sprue the different frontshields for the gun, and oddly moulded in dark green, the anti-aircraft crew.
The moulding quality is very good with nice sharp detail, though there is a bit of clean-up of sinkholes from the moulding process in a few prominent places, worst of all on the back of the gun shields. Clean-up however is simply a case of taking a little extra time to remove these sinkholes and the minor mould seams. This kit is one of Tamiya’s older kits, evidenced by the hull tub coming complete with the mountings for the motors for a remote control versions so the detail is somewhat simplified resulting in a low parts count compared to more contemporary offerings.
The lower hull doesn’t have a huge ammount of detail, being mainly the running gear either side, the exhaust at the back and the spare track link holder at the front. The suspension set up is very simple with each suspension unit moulded as one piece so will require a little surgery if you with to reposition any of the wheels to be going over uneven ground. The tracks are single length vinyl “rubber band” style tracks.
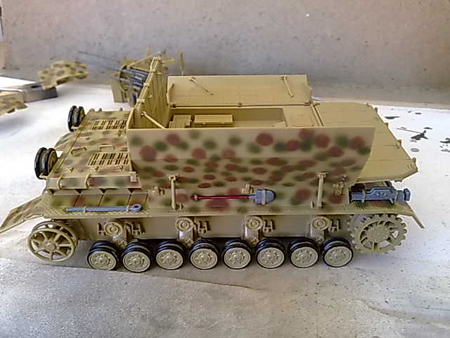
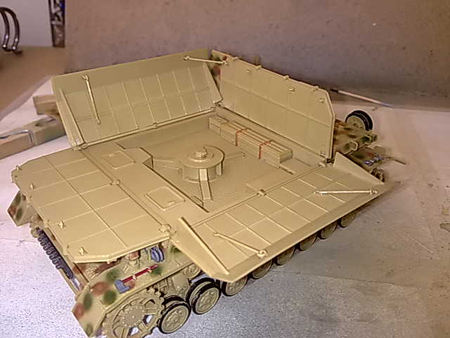
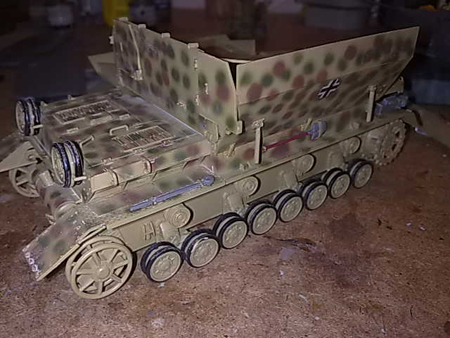
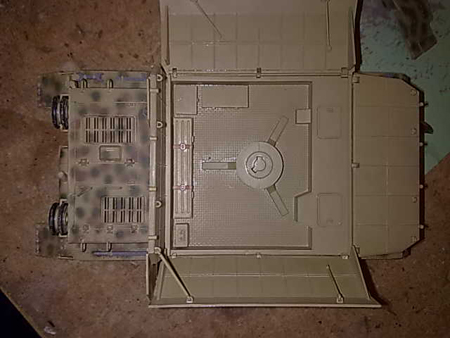
The upper hull was made new for this kit and is very basic with a lot of simplified detail including the driver’s and radio operator’s hatches being moulded as part of the upper hull. The gun platform is also moulded as part of the upper hull and is very simplistic. The fold down armorshields can be positioned up or down.The moulding detail is very good though they, like the gun shields, do have several rather prominent moulding sinkholes to get rid of.
The Flakvierling gun has a reasonable level of detail. Also as mentioned the shields have a number of moulding sinkholes to deal with and scalewise are too thick. A lot of the detail is simplified including the elevation arm but it still makes up into a reasonably good looking piece and can be made so that the guns elevate and traverse if desired.
The figures you get are a four man gun crew designed to go with the Flakvierling 38. There is a seated gunner, two seated loaders and a standing commander, all looking skyward and all dressed in winter gear. The mouldings are a bit heavy and the faces lack any form of individuality or expression. They aren’t terrible figures but nor are they up with the current level of quality and detail we now expect. But I am not going to included them on the model anyway.
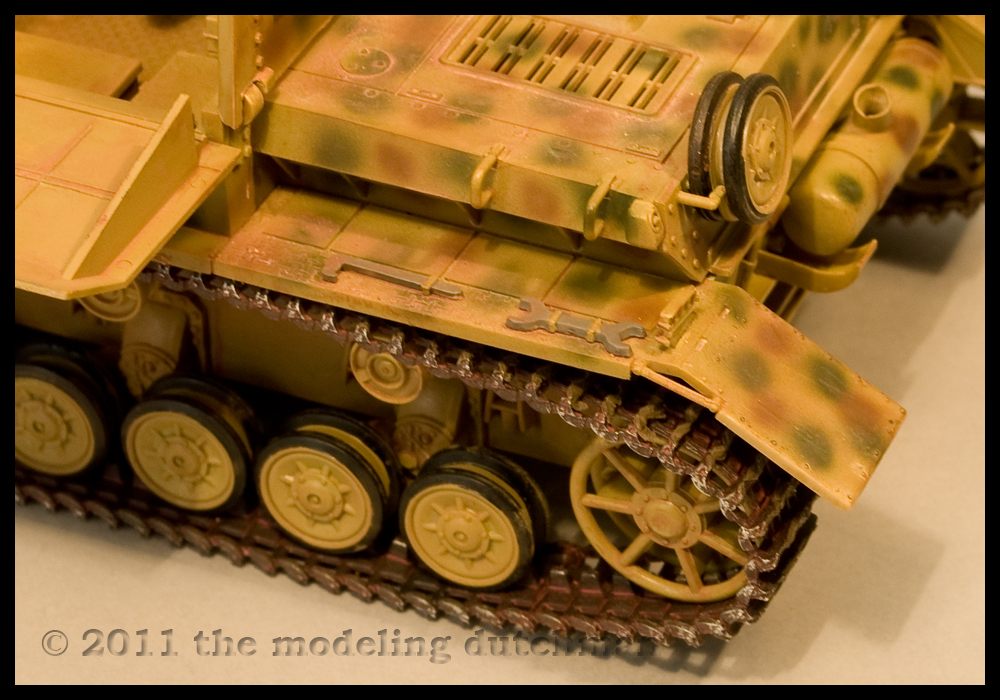
As I mentioned before, the actual type never reached the battlefields. So I took the freedom to apply a fictional scheme. The main goal of this project turned out to be an excercise in armor-building and weathering.
Building the kit
Sooner or later every modeler is drawn to the "dark side". To be honest, this isn't my first "tank-kit", but the last one is over 25 years ago. I build the kit straight from the box and didn't encounter big problems. I only had some trouble fitting the deck on the body. Most of the work went into filling holes on the plates, but that was really all there was. The kit acted as a test object for applying filters and weathering.